Monday, March 21, 2011

Door Design


First Impressions are everything, which is why your classroom door is so important. This particular door design was done during our “Farm” Theme. The kids had so much fun painting all of the different pieces of banner paper for me.
The ingredients for this door design are:
·         Banner paper
·         Paint
·         Straw/hay/raffia (can be purchased at a craft store if necessary)
·         Yellow yarn
·         Green, Orange  and Black construction paper
·         Blue painters tape
·         Packing tape
·         Fishing Line
·         Black permanent marker
Optional ingredients:
·         Black feathers
·         Wiggly eyes
·         Die cut letters
·         Black felt
The Barn: Paint large pieces of red banner paper and attach to the door/wall, with blue painters tape, as the barn. Next fold long strips of white banner paper to create the trim for the barn. Use packing tape to attach to the red banner paper.
The Corn: On either side of the door we attached corn stalks. Paint the banner paper green. Once dry, roll it into a stalk. Paint banner paper yellow. Once dry, roll into an ear of corn, making 5 total. Cut a piece of green construction paper into a triangle and wrap it around the bottom of the ear of corn to create its half opened husk. Tuck some raffia/hay between the construction paper and the corn to create the hairs inside the husk. Attach the corn to the stalk with packing tape. You can either A) attach the stalk to the barn with packing tape or B) tie the top of the stalk with fishing line and hang the stalk by taping the other end of the fishing line above the barn on the wall.
The Horse, Pig and Cow: If you can draw- paint the banner paper, outline the animal with permanent marker, cut out and attach to your door. If you cannot draw- perhaps you have a student who can. Or perhaps the students can get into groups and work together to create one animal. I made each animal stand out by adding 3D features. The horse’s main is yellow yarn. The pig’s nose sticks out off the door and the cows spots are black felt.
The Crow: Cut an oval out of black construction paper. Have one student trace his/her hands on the black paper and cut them out. Attach the hands to either side of the oval. Cut a beak and feet from orange construction paper and attach. Glue wiggly eyes on top. If you wish, you can attach black feathers to the hands as the wings, but the hands also look cute on their own.
The Mouse: I actually just printed the mouse from the internet, cut him out and attached him to a pile of hay. Depending on your classroom door layout, the hay can be stapled to drywall or hot glued to the barn paper (while laying flat).
The Rooster: I also printed the rooster from the internet in black and white and colored him in with markers.  The mouse and rooster were small enough animals that I could print them, whereas the others were too large to do so.
Our themes run for one full month. I left this door design up for the month and when I took it down; I was able to add many of the pieces to my collection for next year.


Saturday, March 19, 2011

Substitute Etiquette

I came across this website: http://www.newteacherhelp.com/Substitute_Etiquette.html during my search for Substitute advice. It serves as a great list of things to leave with a Sub. Be kind to your Sub and leave them with plenty to do. Loved the article. I hope it helps you too.

Friday, March 11, 2011

The Creative Classroom


It is so important to create a classroom environment which promotes creativity. We ask students every day to come up with their most creative ideas in their writing, answers, art, etc. We as teachers must lead our students by demonstrating our own creativity. The classroom walls are your canvas. Go creative-crazy!

Here is an example of my classroom wall. It was during our Zoo theme. We were also studying the colors black and white and the shape trapezoid. In this picture, notice the ABC, 123, and Polka dots. These are my “wall staples.” In other words, I leave them up for about half of the year. I add my theme decorations on top of them. They are my background.

Being that we were studying the color black and white, I made a life-size zebra on banner paper, painted it, cut it out, and taped it on the wall. Around the zebra, I posted the students art work. We glued stripes on the zebra, stamped trapezoids, finger-painted with black paint on white paper, and made zoo animal puppets out of paper bags using paper plates and paint.

Notice the way the puppets are hanging. I have a “clothesline” (string) tied and nailed along the wall. I made a creative clothespin by gluing wood appliqués to the top of them. You can find these appliqués at Michael’s, Hobby Lobby, and Wal-Mart for a very reasonable price. They come in all kinds of trucks, balls, flowers, butterflies, etc. I use these creative clothespins to easily post artwork without using tape or staples. I clip them on and rotate our projects on display with ease.

I hope this inspires your creative classroom.

Thursday, March 10, 2011

Does your school have its own flag?


A student designed flag! What a great idea. Do you have a new principal? Are you a teacher retiring? Are you a spirit coordinator for your school? No matter what the reason, this flag makes a great gift.

Organize a student flag design competition. The students from the school can color any kind of design they want and enter it, to be the artist of the school flag.

1.       Contact a graphic designer or sign company. Get prices and possibilities before introducing the topic. Make sure it is in your price range and capabilities of the company. Some companies have specifications like you must use markers instead of crayons, etc.
2.       Introduce the idea to the entire student body. Make it fun- you might want to introduce it at a pep rally.
3.       Remind the students to use the school colors, mascot, school name, and any other important features of your school.
4.       Give them a deadline. We used a 2 month deadline, but it can certainly be longer or shorter.
5.       Give them a drop box. Whether it is one teacher’s room or the student’s teacher, give them a location to enter their drawings and ask them to only enter their (1) best drawing.
6.       Judge the drawings: allow a teacher committee, student council, or ask the art teacher to make the decision.

Once you have a flag design, submit it to your flag producer.
Present the flag as a gift or as a pep rally highlight.

Tuesday, March 8, 2011

Interactive Bulletin Board

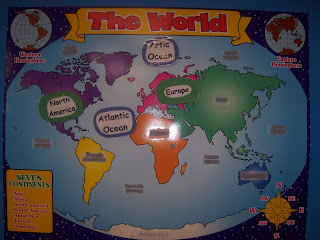
Try this interactive bulletin board on your 1-6th Graders. It tests their knowledge on location of the world’s Continents and Oceans. Relatively simple to make:

Materials:
   Bulletin Board or empty wall space
   A large World Map with or without labels
   Labels for each Continent and Ocean (Options: Computer and printer, construction paper, markers, glue, glitter, etc.) Students can even help create this part of the board.
   Velcro with Sticky on one side
   Three Envelopes (Labeled Oceans, Continents and Check Your Answers)
   A small sheet of paper with the correct answers on it: (I suggest taking a picture of the map with the labels in place, print the picture and insert it into the “Check Your Answers” envelope.)
   Use this fun quiz during free time, centers or as extra credit.
   Laminator (optional)
   Banner Paper
   Create a title for the board

Assembly:
1.       Attach Banner Paper to Bulletin Board
2.       Laminate the map and labels.
3.       Place a small strip of Velcro on the back of each label and its counterpart on the map where it belongs.
4.       Attach map to center of Bulletin Board.
5.       Label envelops and attach centered toward the bottom of the board.
6.       Attach the title for the board at the top.
7.       You may want to attach a border around the outside of the board to give it a finished look.

How to Play:
The student takes a label from the envelope labeled continents or oceans. The student then places the label on the appropriate Velcro spot on the map. When the student feels their answers are correct, they can check their answers by taking the piece of paper out of the “Check Your Answers” envelope.

Teacher’s Note:
I really enjoy using this board in my classroom because it is entirely student directed. I use it as a center primarily. The students enjoy testing each other and timing themselves to see who can do it faster. I leave a stop watch near to board and let them come up with the timing idea on their own. Enjoy!